Hanko Elements have made it incredibly simple to add authentication to your application and get started quickly. However, you may have noticed, all authentication emails are sent from mail@hankocloud.com.

While this works perfectly initially, as your product grows, you might wanna send emails through your custom domain to enhance brand visibility and have full control over your emails. Hanko makes it super easy for you to do that through your custom SMTP server.
We'll be using the SMTP server provided by Resend for this purpose. Resend is a modern tool based on popular open source project react-email that makes it super easy to send and manage transactional emails. Additionally, it will enable you to monitor all your Hanko authentication emails and verify if they were actually sent.
So, let's get started.
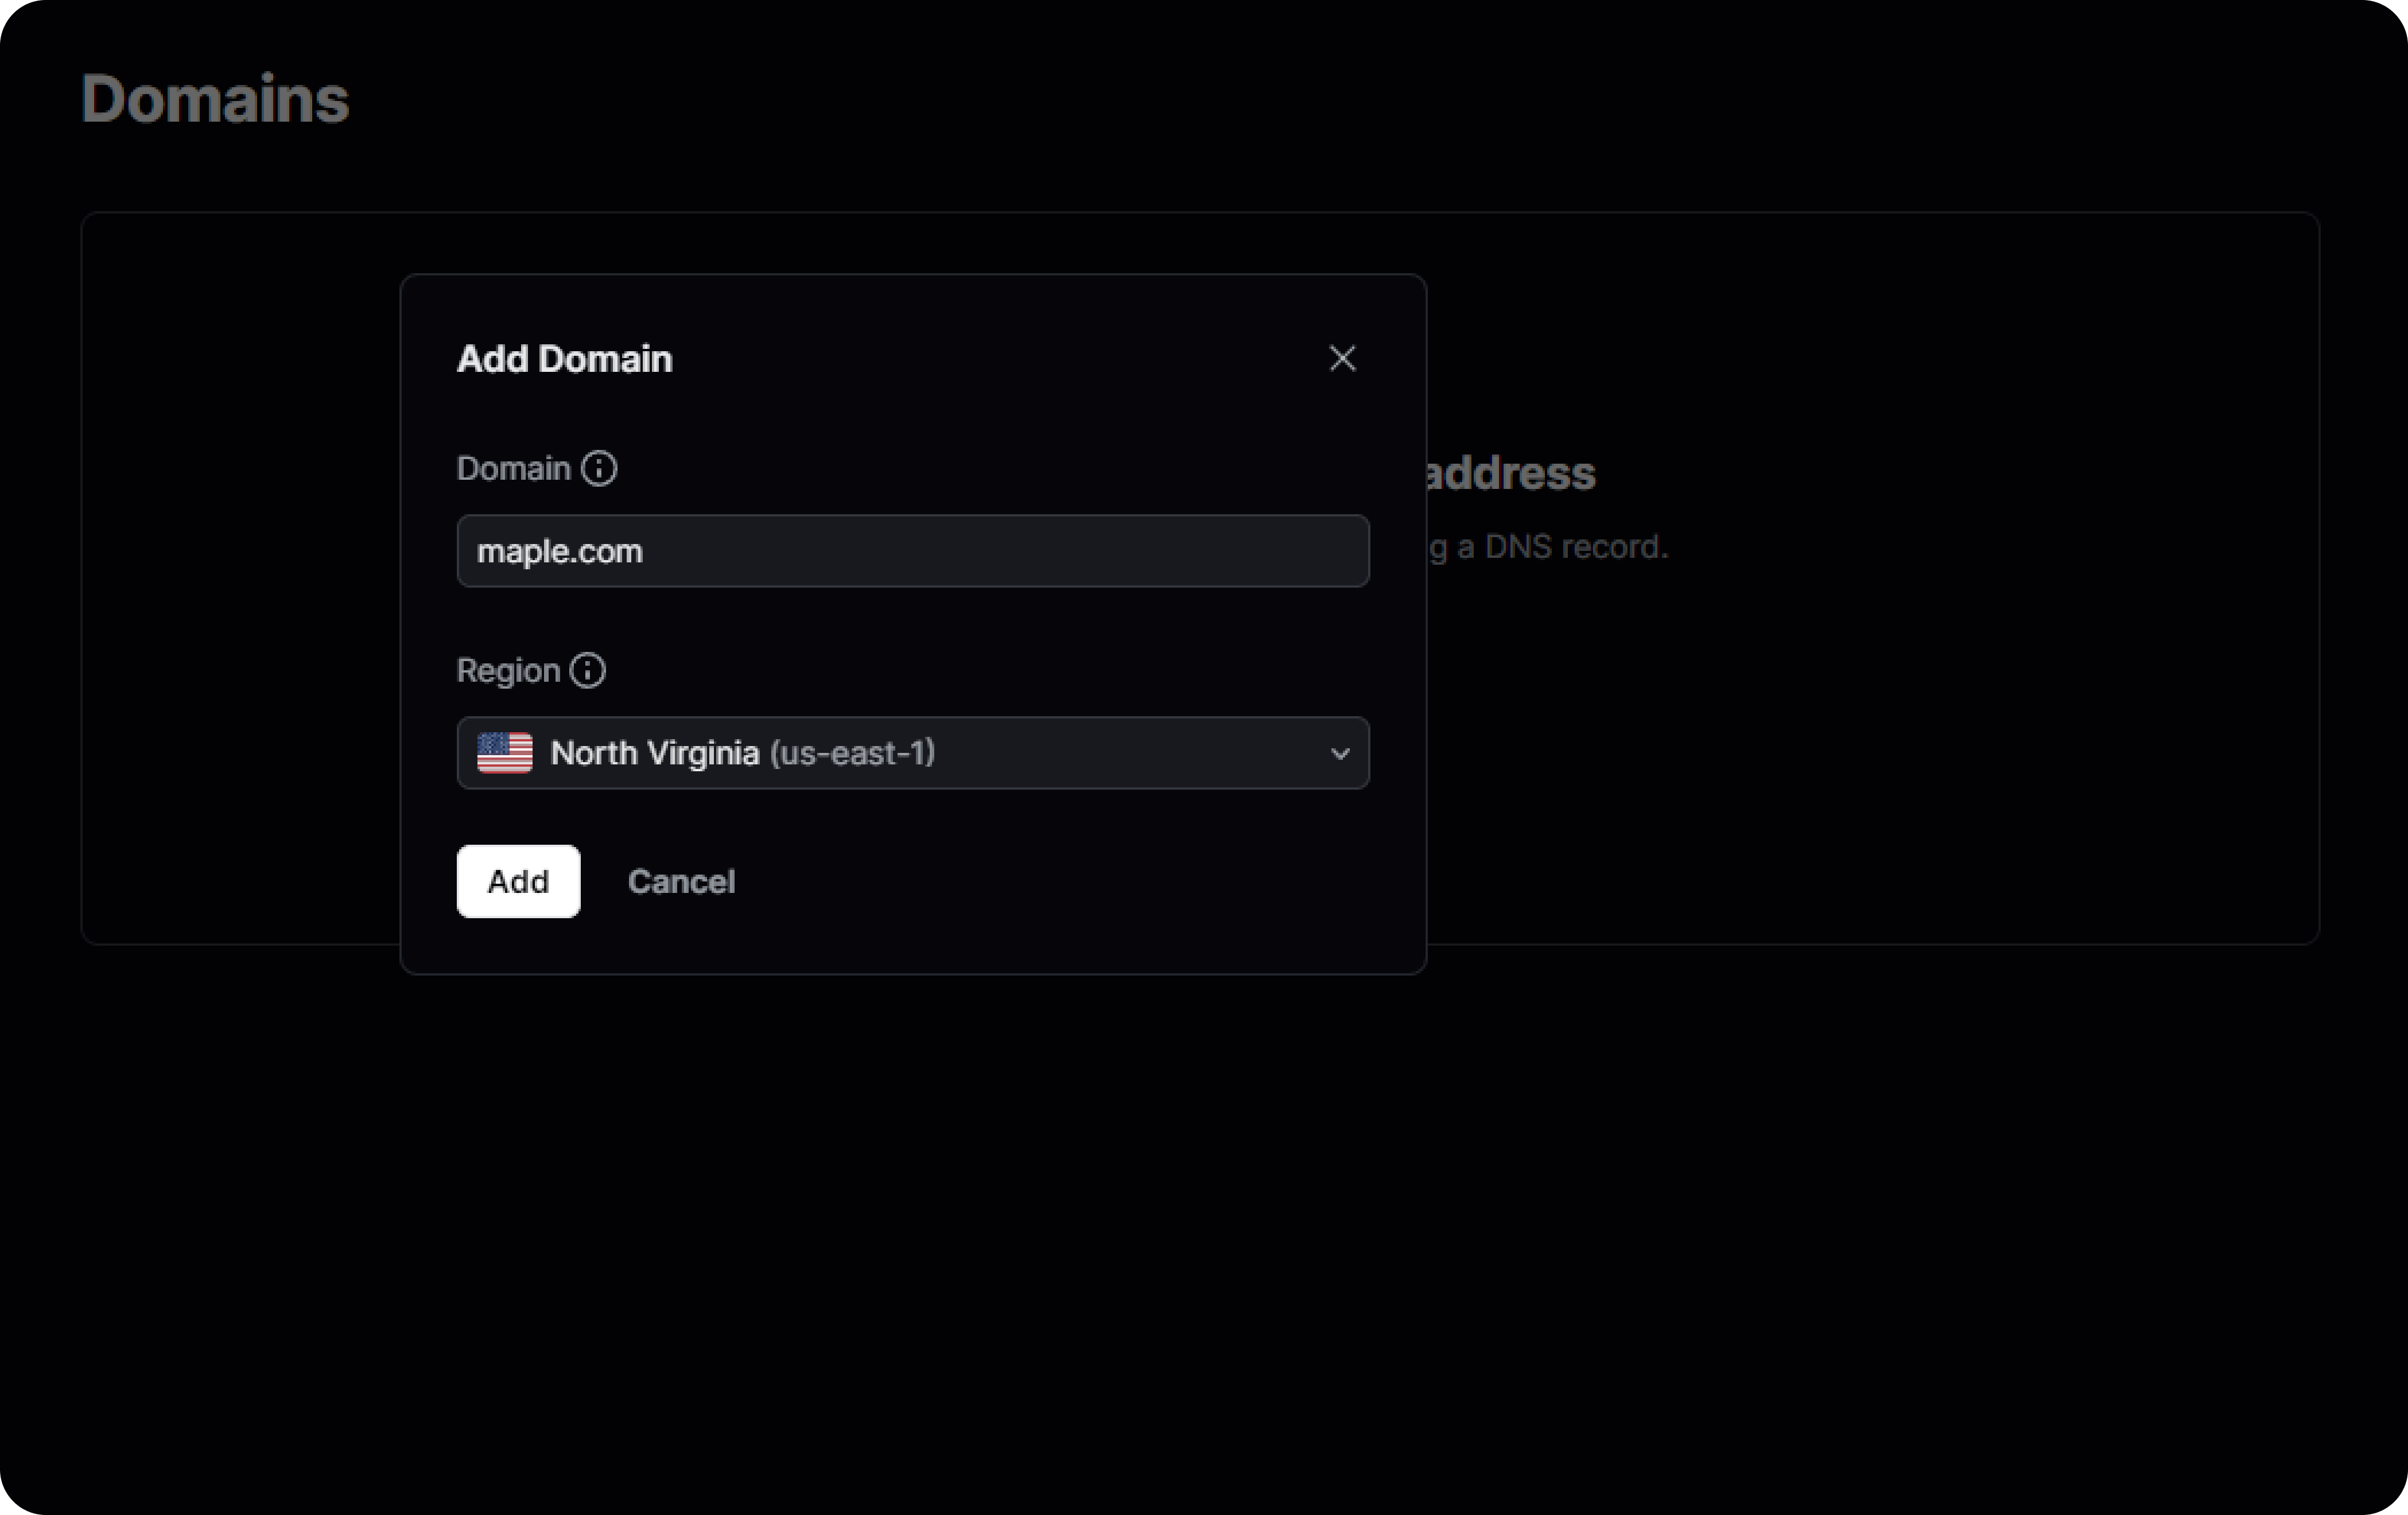
Head over to Resend and create an account if you haven't yet. Navigate to Domains section in the right sidebar, click on 'Add domain', and add your domain and region.
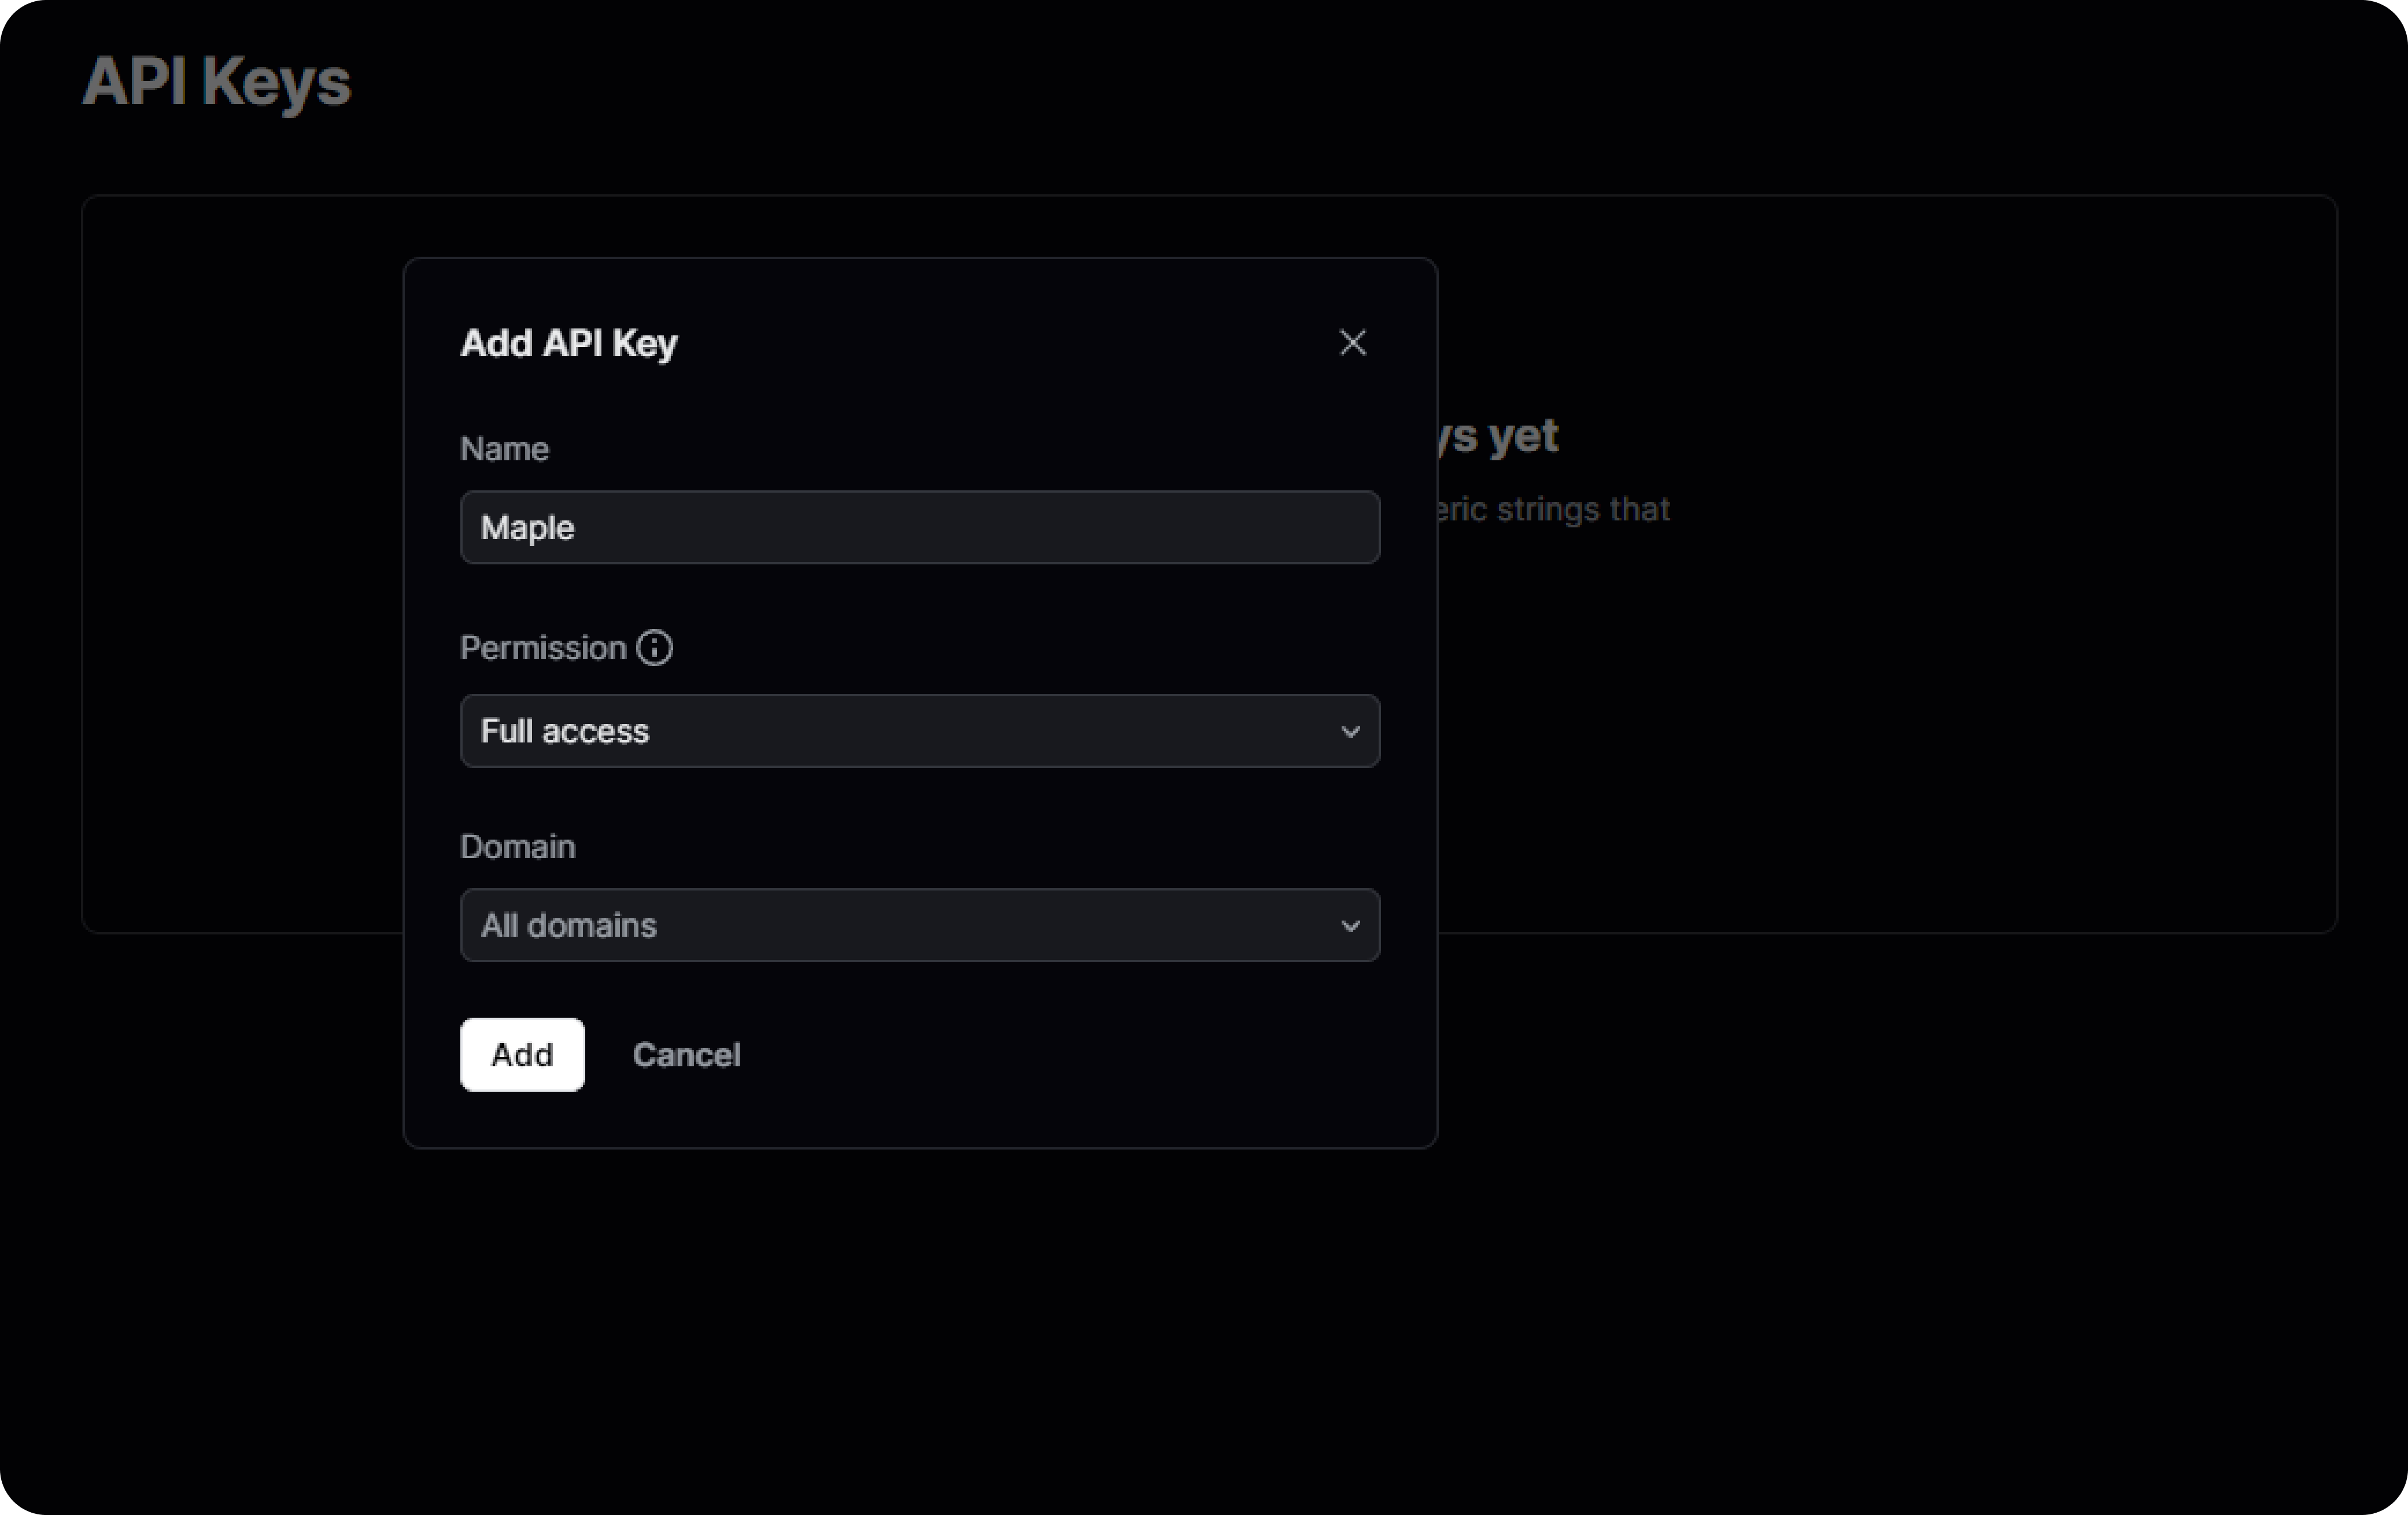
Now you'll need to create an API key. Go to the API Keys section, click on 'Create API Key', and fill in the required details.
Navigate to resend SMTP page, you'll see all the details of your SMTP server here. You'll need to copy-paste these to Hanko.

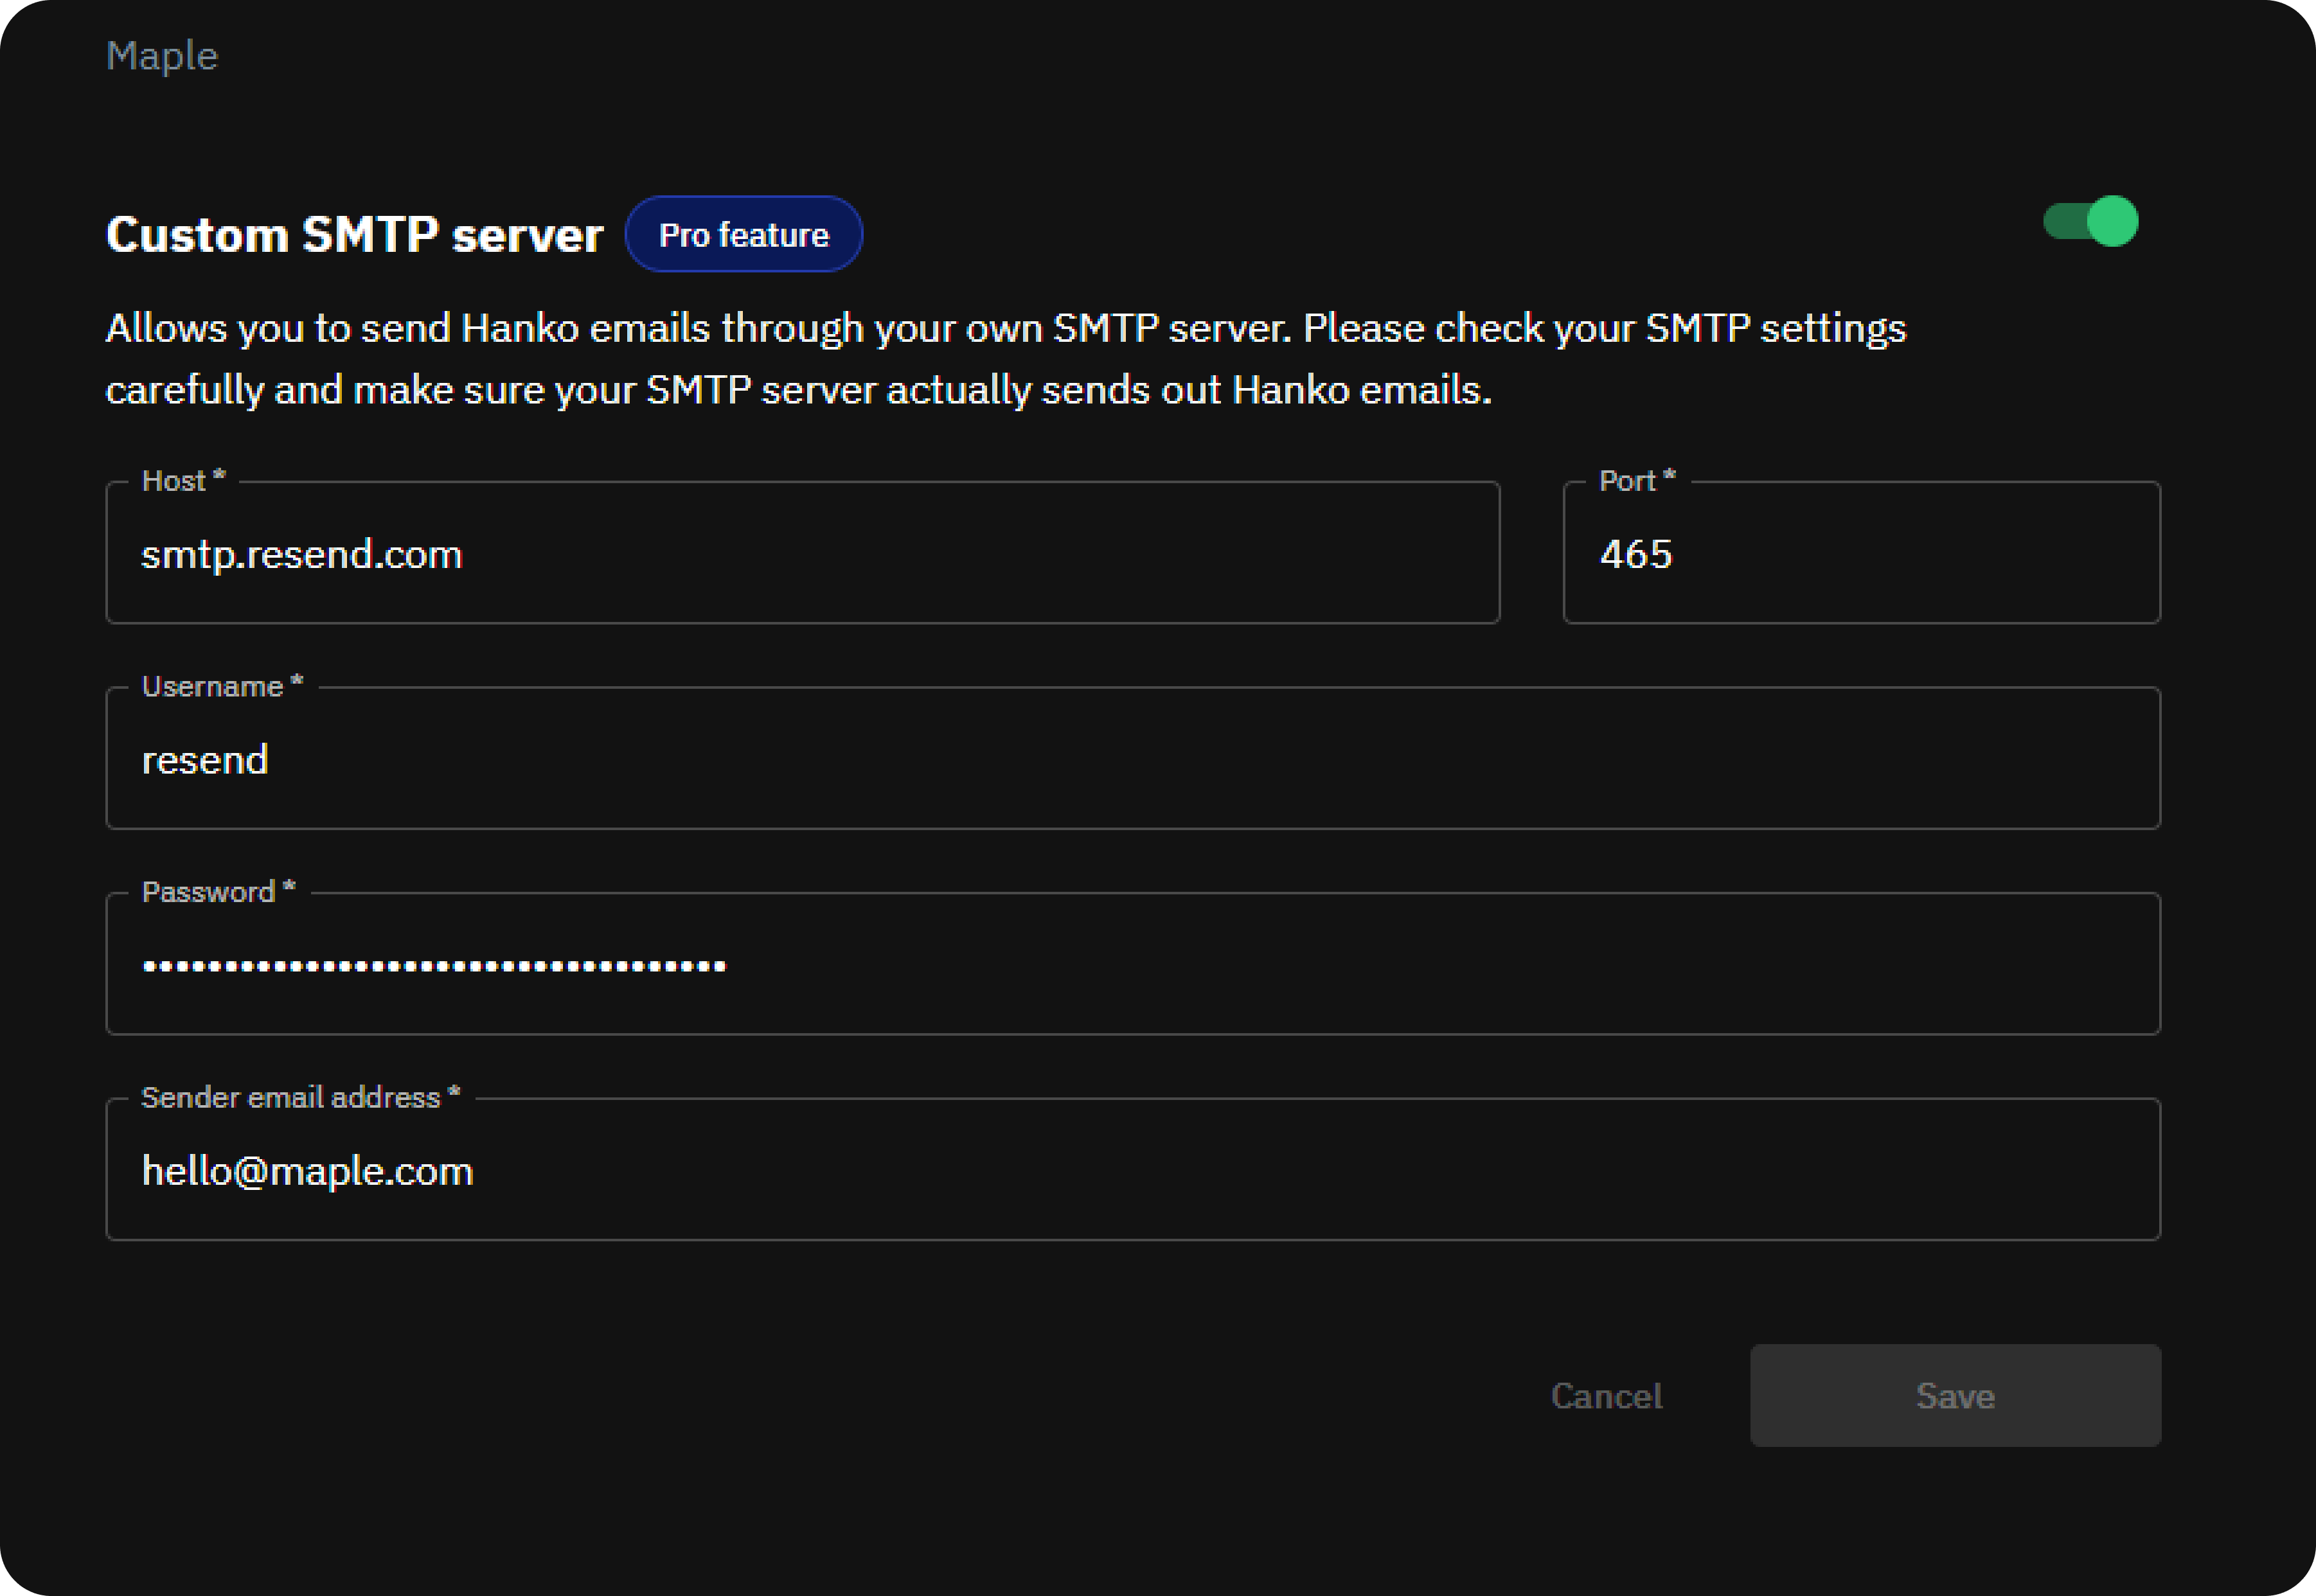
Next, go to your Hanko project and navigate to 'Settings' in the sidebar. Click on 'SMTP' there and fill in the details.
Copy the host, port, and username from resend. Next, in the 'Password' section, enter the API key you got from Resend. In the 'Sender email address' section, put the email address you'll be sending emails from, and then hit 'Save'.
And there you go! Your emails are now ready to be sent from your custom domain.

Check the Resend docs to learn more about it.

Magic links and email passcodes both promise passwordless login with low friction. But once you look at cross-device sign-in, browser behavior, email

Why we’re moving Hanko from a Kubernetes-native single-tenant setup to a multi-tenant architecture and what “cloud native” got wrong for a small team.

"Zombie passkeys" – passkeys that exist in a limbo state between client devices and authentication servers.